
Table of Contents
- Why Wall-Mounted Storage Works for Small Workshops
- Pegboard Tool Organizers: Affordable and Flexible
- Wall Rail Tool Storage Systems: Heavy-Duty Organization
- Small Workshop Organization Ideas: Matching Storage to Your Tools
- How to Store Tools in a Garage: Installation and Safety
- DIY vs. Prebuilt Wall-Mounted Systems
- Making the Right Choice for Your Workshop
- Frequently Asked Questions
Last Updated: October 14, 2026
Why Wall-Mounted Storage Works for Small Workshops
Wall-mounted tool organizers solve limited floor space: vertical storage keeps tools within arm's reach without sacrificing workspace.
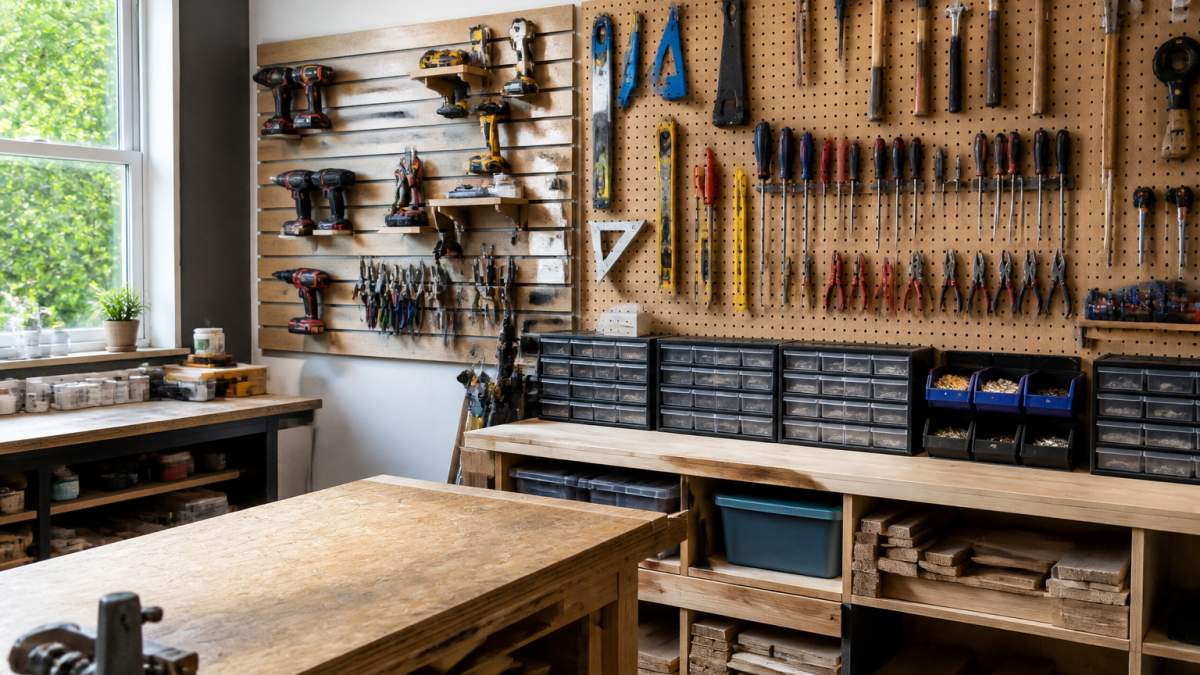
A wall-mounted tool organizer frees bench and floor space, shows everything at a glance, and keeps tools accessible and protected.
At Center of Help General Store, we've seen the right wall-mounted storage transform a chaotic workshop into a functional one. The key is matching the system to your tools and wall space.
Pegboard Tool Organizers: Affordable and Flexible
Pegboard is the classic choice: affordable, flexible, and suited to hand tools, small power tools, and accessories.
Its real advantage is customization: rearrange hooks and holders as your tool collection changes, ideal when you're still figuring out your layout.
Pegboard has limits.
Installation is straightforward: mount the panel with brackets, then add inexpensive hooks and holders. Pegboard collects dust in the holes, so clean it occasionally.
Wall Rail Tool Storage Systems: Heavy-Duty Organization
Wall rail systems (also called slatwall) are the heavy-duty upgrade.
The trade-off is flexibility: you're committed to the rail spacing when you buy the panel. For many workshops that's fine; for others it's too restrictive.
Cost is higher than pegboard, panels and accessories are pricier.
Installation requires anchoring to wall studs, since wall rail systems are heavier than pegboard and need solid support.
Small Workshop Organization Ideas: Matching Storage to Your Tools
The best wall-mounted tool organizer fits your actual workflow, not the one that photographs best. Wall space is your scarcest resource, so map each tool category to a holder type, mounting height, and realistic load, then place it where you reach for it.
Below is a practical mapping used by many small-shop woodworkers and mechanics. Treat the numbers as starting points, your reach, ceiling height, and bench layout will shift them.
Hand tools: pegboard and slatwall hooks
Hand tools (hammers, wrenches, screwdrivers, pliers, chisels) are the easiest category to store. A single 2 ft × 4 ft pegboard panel at eye level holds roughly 30-50 hand tools using straight hooks, ring hooks, and screwdriver holders.
- Screwdrivers and pliers: dedicated screwdriver racks or plier racks hold 6-12 tools in a footprint about 12 in wide. This is denser than loose hooks and keeps tips visible.
- Wrenches: magnetic bars or wrench racks. A 12 in magnetic bar typically holds 8-12 wrenches and costs less than a set of individual hooks.
- Hammers and mallets: single ring hooks rated for 5-10 lbs each. Space them 6-8 in apart so handles don't tangle.
Mount hand-tool panels so the top row sits at roughly shoulder height (about 55-60 in from the floor for an average adult).
Power tools: drill holders, racks, and shelf brackets
Power tools are where wall-mounted storage either works brilliantly or fails dangerously. A cordless drill weighs 3-6 lbs with battery, a circular saw 8-12 lbs, and a corded hammer drill 10-15 lbs, and the leverage of a hanging tool multiplies the load on the anchor point.
- Drills and impact drivers: dedicated drill holders that cradle the tool by the body, not the chuck. A single holder is typically rated 10-20 lbs, well above the tool weight, which is the safety margin you want.
- Circular saws and reciprocating saws: wall-mounted saw racks or heavy-duty J-hooks rated 25 lbs or more. Hang them blade-down or blade-in, never trigger-down.
- Batteries and chargers: a dedicated charging shelf or battery rack. Batteries are heavy (a 5.0 Ah 18V pack is roughly 1.5 lbs) and you'll have several. A 24 in shelf with a lip holds 6-10 packs safely.
A common pattern in small shops is a two-tier power-tool wall: drills and drivers at chest height (about 45-50 in) so you can grab them without reaching over a bench, and heavier saws higher up where you only pull them down occasionally.
Small parts and hardware: enclosed bins, not open hooks
Screws, nails, bolts, washers, and anchors destroy otherwise tidy workshops: loose hardware on open hooks spills, mixes, and disappears. Enclosed storage is the answer.
- Pegboard-mounted bins: the standard 4 in × 6 in plastic bin holds a few hundred screws or a few dozen bolts. A 2 ft × 4 ft pegboard panel can carry 12-20 bins comfortably.
- Slatwall bins: typically larger (6 in × 9 in or bigger) and rated for 5-10 lbs each, which is plenty for hardware.
- Label everything. A label maker is the single highest-ROI purchase for small-parts organization. Unlabeled bins become a junk drawer within a month.
Place small-parts storage near your assembly or bench area, not across the room. If you have to walk to grab a washer, you'll stop using the system.
Placement logic: store tools where you use them
The principle that separates a working shop from a Pinterest board: store tools at the point of use.
- Bench-adjacent wall: hand tools, frequently used drivers, small parts. Everything within arm's reach of where you sit or stand.
- Back wall or side wall: power tools, saws, less-frequent items. Still visible, still accessible, but out of the primary work zone.
- High wall (above 6 ft): long-term storage, spare batteries, seasonal tools, bulky items you use a few times a year.
Before you drill a single hole, walk through a typical project in your head and note every tool you touch. Those belong on the wall within arm's reach; everything else can go higher, further, or into a cabinet.
How to Store Tools in a Garage: Installation and Safety
Installation is where wall-mounted tool organizers succeed or fail. A panel that pulls out of drywall under load drops tools, damages the wall, and can injure whoever is underneath. Safe installation comes down to three things: your wall type, your anchor type, and your actual load.
Step 1: Identify your wall type
Different walls need different anchors. Before you buy hardware, figure out what you're mounting into.
- Wood-framed wall with drywall or plywood: the most common workshop wall. Studs are typically 16 in on center (sometimes 24 in in newer construction). You can anchor directly into studs with lag bolts or heavy-duty wood screws.
- Masonry (concrete block, brick, poured concrete): common in garages and basements. Requires masonry anchors, sleeve anchors, wedge anchors, or Tapcon-style concrete screws. Drywall anchors are useless here.
- Steel stud framing: found in some newer garages. Requires self-drilling screws or toggle bolts rated for the load. Standard wood screws will strip out.
If you're not sure what's behind the drywall, drill a small test hole in an inconspicuous spot, or use a stud finder with a deep-scan mode. A cheap stud finder is a better investment than a wall repair.
Step 2: Do the load math before you drill
Every wall-mounted system has a working load limit and every anchor has its own rating.
A quick example for a 2 ft × 4 ft pegboard panel:
- Panel and mounting brackets: ~5 lbs
- Hooks and holders: ~2 lbs
- Tools: 30-40 lbs for a mixed hand-tool load
If your anchors are rated for 50 lbs each and you use four of them into studs, you have a comfortable margin.
A common pattern in small shops: mount the panel into at least four studs (or four masonry anchors), and distribute heavy tools across the panel rather than clustering them in one corner.
Step 3: Anchor correctly for the load
- Into studs: use lag bolts (typically 1/4 in × 2.5 in or 5/16 in × 3 in) or heavy-duty structural screws. Pre-drill to avoid splitting the stud. Two anchors per stud is standard for a full-height panel.
- Into masonry: use sleeve or wedge anchors sized to the panel's mounting holes. Drill the hole to the anchor's specified diameter and depth, undersized holes weaken the hold, oversized holes make the anchor spin.
- Into steel studs: use self-drilling screws paired with toggle bolts for anything heavier than a few pounds. Steel studs alone won't hold a loaded pegboard.
Step 4: Mount level and leave clearance
- Use a level. A crooked panel looks bad and causes hooks to slide. More importantly, a panel mounted out of level can concentrate load on one side.
- Leave 1-2 in of clearance between the panel and the wall. This allows air circulation, makes hook installation easier, and prevents the panel from pressing directly against the wall where moisture can collect.
- Check for obstructions before drilling: wiring, plumbing, and gas lines can run through walls. In a garage, this is a real risk. If you're unsure, keep the panel above the height where horizontal runs typically sit (usually 12-18 in from the floor) or consult a professional.
Step 5: Test before you load
After mounting, hang a weight roughly equal to your expected load, a bucket of tools works, and let it sit for 24 hours. Check for sagging, pulled anchors, or wall cracking.
Most wall-mounted tool organizer installations take 1-2 hours with basic tools. If you're uncertain about wall type, anchor selection, or load math, ask someone experienced to help, a failed installation is worse than none.
DIY vs. Prebuilt Wall-Mounted Systems
You have two paths: build your own system or buy a prebuilt one. Each has real trade-offs.
DIY systems give you maximum control: you choose the wall material (pegboard, plywood with French cleats, slatwall), the mounting hardware, and every hook and holder.
Prebuilt systems come as complete kits: mount the panel, add the included accessories, and you're done.
DIY makes sense if you have specific requirements a prebuilt system doesn't meet or you enjoy building.
Making the Right Choice for Your Workshop
Start with your constraints: available wall space, tool collection, and budget. Measure your walls.
For most small workshops, pegboard is the practical starting point: affordable, flexible, and able to handle most tool types.
The goal isn't a perfect system, it's one that works for your actual workflow.
At Center of Help General Store, we understand that workshop organization is personal.
| System Type | Best For | Load Capacity | Cost Level | Installation Time |
|---|---|---|---|---|
| Pegboard | Hand tools, light power tools | Moderate (20-50 lbs) | Budget-friendly | 1-2 hours |
| Wall Rail/Slatwall | Heavy power tools, frequent use | Heavy (50+ lbs) | Moderate to high | 1-2 hours |
| DIY (French Cleats) | Custom layouts, specific needs | Varies by design | Low to moderate | 2-4 hours |
| Combination System | Mixed tool types, flexibility | Varies | Moderate | 2-3 hours |
Frequently Asked Questions
What is the best wall-mounted tool organizer system for a small workshop?
The best choice depends on your tools and wall space. Pegboard offers affordable flexibility and works well for hand tools and small items. Wall rail systems handle heavier loads and larger tools. For small workshops with limited wall space, a pegboard system typically provides the most storage per square foot and allows easy reconfiguration as your needs change. Consider your heaviest tools and available wall area before deciding.
How much weight can a wall-mounted tool organizer hold?
Weight capacity varies significantly by system type and installation. Pegboard typically holds 5-25 pounds per hook depending on hook quality and wall anchors. Heavy-duty wall rail systems can support 50-150+ pounds when properly installed into wall studs. The wall itself matters: drywall alone cannot support heavy loads without proper anchors, while studs provide the strongest foundation. Always verify your wall type and use appropriate fasteners before mounting any organizer.
Is pegboard or a wall rail system better for workshop tools?
Pegboard suits hand tools, small power tools, and hardware storage because it's affordable, flexible, and easy to customize. Wall rail systems work better for heavier items like large power tools and multiple drills because they distribute weight more effectively. Many workshops use both: pegboard for frequently accessed hand tools and small parts, wall rail systems for heavier equipment. Your choice depends on which tools you use most and your available budget and wall space.
What should I consider before mounting a tool organizer on my workshop wall?
Check your wall type first, studs provide the strongest support, while drywall requires heavy-duty anchors. Measure your available wall space and plan the layout based on your most-used tools. Consider load capacity: heavier tools need studs or reinforced anchors. Ensure electrical outlets and plumbing won't be damaged. Start at a comfortable height for daily access and leave room to expand. Test the mounting system with a light load before adding all your tools.
Small workshop organization isn't complicated, but it does require planning. The right wall-mounted tool organizer keeps your tools accessible, your workspace clear, and your workflow efficient. Start with your actual needs, choose a system that matches them, and install it properly. Visit Center of Help General Store to explore wall-mounted storage solutions designed for small spaces and real workshops. We'll help you find the right fit for your tools and your wall space.