
Table of Contents
- Why Deep Kitchen Drawers Get Messy (and What It Costs You)
- Measure First: Sizing Deep Kitchen Drawer Organizers Correctly
- The 7-Step Method to Organize Deep Kitchen Drawers
- Kitchen Drawer Dividers: Types That Work in Deep Drawers
- How to Organize Pots and Pans in Drawers Without Stacking Chaos
- Deep Drawer Storage Ideas for Containers, Lids, and Awkward Spaces
- Budget, Maintenance, and Safety: Making the System Last
- Conclusion
- Frequently Asked Questions
Last Updated: October 16, 2026
Why Deep Kitchen Drawers Get Messy (and What It Costs You)
Deep kitchen drawers are the hardest storage in the house to keep tidy.
At Center of Help General Store, we hear the same complaint again and again: "My kitchen drawers are a nightmare and I waste so much time looking for things." A few extra minutes of digging daily becomes hours over a year.
Three reasons, mostly:
- No zones. Everything gets tossed in one big pile instead of being split front to back.
- Wrong organizer sizes. A divider that fits a shallow drawer leaves gaps in a deep one.
- Stacking instead of standing. Cookware and containers get piled, so the bottom layer is unreachable.
The good news: how to organize deep kitchen drawers is solvable. Below is a seven-step method for any deep drawer, plus sizing rules, divider types, and budget options. The fix starts with a tape measure, not a shopping cart.
Measure First: Sizing Deep Kitchen Drawer Organizers Correctly
Measure the inside of the drawer before you buy anything. Most organizing fails because the organizer doesn't match the drawer.
Here's what to measure:
- Width, depth, and height of the drawer interior, in centimetres.
- The drawer's usable height with the drawer closed, so tall items still clear the frame.
- The glide weight limit if you plan to store heavy cookware.
Then subtract a small buffer from each measurement; a 1 cm gap beats a jammed divider.
For deep drawers, choose stackable or modular organizers so you build up instead of spreading out. A single oversized insert wastes depth; two smaller stackable bins use the same footprint twice.
For awkward widths, adjustable dividers beat fixed trays, they flex to fit and move as your needs change.
The 7-Step Method to Organize Deep Kitchen Drawers
The system is simple: empty, sort, group, assign homes, zone, fill, and label, one drawer at a time.
Work on one drawer per session. Trying to fix the whole kitchen at once is why most organizing projects stall halfway.
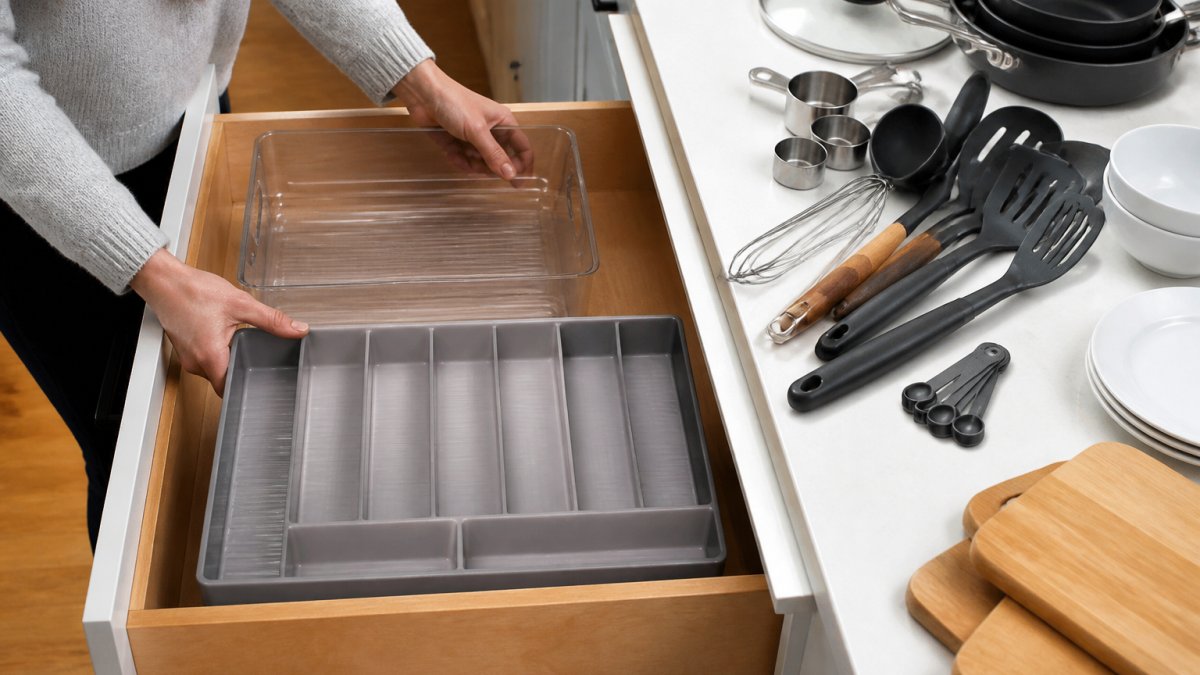
Step 1: Empty, Sort, and Edit
Pull everything onto the counter. Wipe the drawer, then lay down a drawer liner to stop items sliding and protect the base.
Now sort into four piles:
- Keep, used weekly.
- Relocate, belongs in another drawer or room.
- Donate, good condition, unused.
- Discard, broken, missing lids, duplicates.
Be honest with the discard pile. A deep drawer is not a storage unit for things you never use.
Step 2: Group Similar Items and Assign a Home
Group like with like: all utensils, food-storage containers, and kitchen tools together.
Then give every group a home: when each item has a designated spot, putting things away takes seconds, which keeps a drawer organized long after the novelty wears off.
Keep frequently used items at the front and rarely used items at the back; deep drawers hide their rear third, so that's where the once-a-month stuff belongs.
Step 3: Add Zones Front to Back and Organize Vertically
Split the drawer into three zones:
- Front zone, daily items, easy to reach.
- Middle zone, weekly items.
- Back zone, occasional items and backups.
Then organize vertically. Stackable bins and clear storage cubbies build upward instead of sideways, and clear sides let you see inside without pulling the bin out.
Kitchen Drawer Dividers: Types That Work in Deep Drawers
Not every divider suits a deep drawer.
Here's how the main types actually behave in deep drawers:
| Divider type | Best for | Deep-drawer trade-off |
|---|---|---|
| Adjustable tray dividers | Baking trays, cutting boards, container lids | Need a firm fit or they slide; check the tension mechanism, not just the width range |
| Stackable bins | Utensils, small tools, snacks | Buy matching sizes so they nest; mismatched sets waste vertical space |
| Compartment organizers | Flatware, spices, small items | Fixed slots limit odd shapes; measure your longest utensil before buying |
| Expandable dividers | Awkward drawer widths | Weak springs sag under heavy loads; look for locking or screw-tight models |
| Deep drawer inserts | Full-width coverage | Measure carefully, most are sized for standard 50-60 cm widths, not custom cabinetry |
| Pegboard or peg systems | Pots, pans, plates | Adjustable but require a flat base; not ideal for drawers with a curved or sloped interior |
Tray dividers are the workhorse for vertical items, holding trays, boards, and container lids upright so you can flip through them like files.
Compartment organizers suit small items that would otherwise scatter: spices, snacks, flatware, and loose kitchen tools.
For single-use drawers, one insert is enough.
Awkward dimensions are the norm, not the exception. Older kitchens often have drawers narrower at the back, deeper than standard, or wider than any off-the-shelf insert; there, adjustable dividers and modular bins beat any fixed tray. For drawers over 35 cm deep, use a two-layer system: a full-width base of stackable bins topped with a slim tray divider for flat items.
Weight matters more than width. A divider that fits perfectly but can't hold a cast-iron skillet will fail.
How to Organize Pots and Pans in Drawers Without Stacking Chaos
Stacking pans flat means lifting three to reach the fourth, which is how crowded drawers happen even with plenty of space.
The ergonomic rule for deep drawers: store by frequency and weight together.
Here's how that plays out with pots and pans:
- Daily-use pans (skillet, saucepan): front zone, standing on edge in a peg or slotted system, handles facing the same direction so you can grab without looking.
- Weekly-use pots (stockpot, Dutch oven): middle zone, nested no more than two deep with a felt or liner pad between them.
- Occasional cookware (roasting pan, specialty molds): back zone, stacked flat or stood on edge if the drawer is tall enough.
- Lids: keep separate in a tray divider at the back or middle, standing upright. Lids are flat and easy to file; they don't belong in the same zone as the pans they fit.
Weight distribution is not optional. A deep drawer full of cast iron strains the glides and makes the drawer hard to pull.
Accessibility matters for every household. With limited mobility, arthritis, or small children, put the heaviest and most-used items in front and avoid stacking more than two deep, a full-arm reach for a heavy pot is a hazard. In shared kitchens, tape a photo of the zones inside the cabinet door so everyone puts things back in the same place.
Maintenance for pots and pans drawers: once a month, pull everything out, check for loose handles or damaged non-stick surfaces, and re-stack.
Deep Drawer Storage Ideas for Containers, Lids, and Awkward Spaces
Food-storage containers are the worst offenders: they multiply, the lids vanish, and the drawer becomes a rummage bin.
Start by pairing every container with its lid. Recycle anything without a partner. Then store the survivors by size.
- Nest same-size containers inside each other, two or three deep.
- Stand lids upright in a slim tray divider or a dedicated lid rack.
- Group by size, not by shape, so nesting actually works.
- Cap the collection. Keep only what you use in a normal week.
For awkward drawer dimensions, adjustable dividers and modular bins beat any fixed insert. Odd angles and narrow rear sections are common in older kitchens, and flexible pieces handle them.
Deep drawer cabinets with a single wide drawer are the hardest.
Budget, Maintenance, and Safety: Making the System Last
You don't need to spend much to fix a messy drawer, some of the best fixes cost nothing.
No-purchase options:
- Cut down sturdy cardboard boxes into drawer dividers.
- Reuse shallow food containers as compartment bins.
- Use a baking tray as a tray divider for boards and lids.
- Line the drawer with non-slip shelf liner you already own.
Low-cost buys that earn their place:
- Adjustable dividers for awkward widths.
- Stackable clear bins in two matching sizes.
- A slim lid rack for container lids.
- Non-slip drawer liner for the base.
Maintenance keeps it working. Once a month, spend five minutes per drawer. Pull out anything that has drifted in, return stray items to their homes, and check that dividers still sit tight. A system only holds if you maintain it.
Safety basics:
- Keep knives in a slotted tray, never loose.
- Spread heavy cookware across low drawers.
- Do not overload glides past their rating.
- Keep sharp or heavy items away from the front edge where children can reach.
Conclusion
A deep drawer turns into a black hole when it has no zones, no homes, and no vertical storage. Fix those three things and it stops fighting you.
The method is the same every time: measure, empty, sort, group, zone, stack, and maintain. One drawer per session, and the whole kitchen follows.
If you'd rather skip the guesswork, Center of Help General Store stocks versatile storage solutions built for real kitchens and workshops. We also carry kitchenware and bath essentials for new homeowners setting up a whole house at once.
Get started with Center of Help General Store and turn every deep drawer into storage you can actually use.
Frequently Asked Questions
What should I store in deep kitchen drawers instead of upper cabinets?
Use deep drawers for heavy or bulky items that are hard to lift overhead: pots and pans, mixing bowls, small appliances, food-storage containers, and their lids. Reserve upper cabinets for light, less-used items. Deep drawers also suit flatware, utensils, and spices if you add compartment organizers or inserts. The rule is simple: if you use it daily and it has weight, keep it between hip and waist height so you can reach it without stretching or climbing.
How do I keep items from getting lost at the back of a deep drawer?
Divide the drawer front to back into zones. Put frequently used items in the front third, less-used items in the middle, and backups or seasonal pieces at the back. Then block the rear space with a stackable bin or a deep drawer organizer so items cannot slide into a dead corner. Lining the drawer and using non-slip dividers also stops contents from shifting when you open and close it. Label the rear bins so you know what is there without pulling everything out.
What organizers work best in deep kitchen drawers?
It depends on the drawer depth and contents. For cookware, use vertical pan dividers or a peg system so pans stand on edge. For utensils and flatware, use compartment organizers with adjustable dividers. For food-storage containers and lids, use stackable bins or clear storage cubbies. For awkward or extra-deep drawers, combine a shallow tray at the front with a taller bin at the back. Measure the internal width, depth, and height before buying, and leave a small gap so the drawer glides freely.
Can I organize deep kitchen drawers without buying anything?
Yes. Start by emptying and sorting each drawer, then group similar items and give each group a home. Use shoeboxes, cut-down cardboard, or existing baking trays as free dividers. Arrange items vertically where possible, such as standing sheet pans and cutting boards on edge. Move rarely used items to a less convenient drawer and keep daily items in the front zone. This no-purchase approach often reveals what you actually need before you spend on organizers.